 cinemasetfree.com
Inviting Collaborators
TL;DR — Inviting by email is a Pro feature. Fill in the invite form and CSF emails a unique link that expires in 7 days; once the recipient signs in and accepts, they appear as a linked team member. On a free plan you’ll see an upgrade prompt instead — use Quick-Add when you just need a name on the roster.
Inviting Requires Pro
The email-invite form only appears on Pro projects. On a free plan, the Team tab shows an “Upgrade to Pro to invite team members by email” banner with an Upgrade button that takes you to your subscription settings. Quick-Add and everything else on the Team tab still work on the free plan — email invitations are the one gated piece.
When to Invite vs. Quick-Add
Invite by Email when the person needs to log in and collaborate — view schedules and storyboards, access the project dashboard, or take part in the work.
Quick-Add when you just need a placeholder for budgeting, scheduling, or deal-memo prep. The person doesn’t need an account and won’t receive any email.
The Invite Form
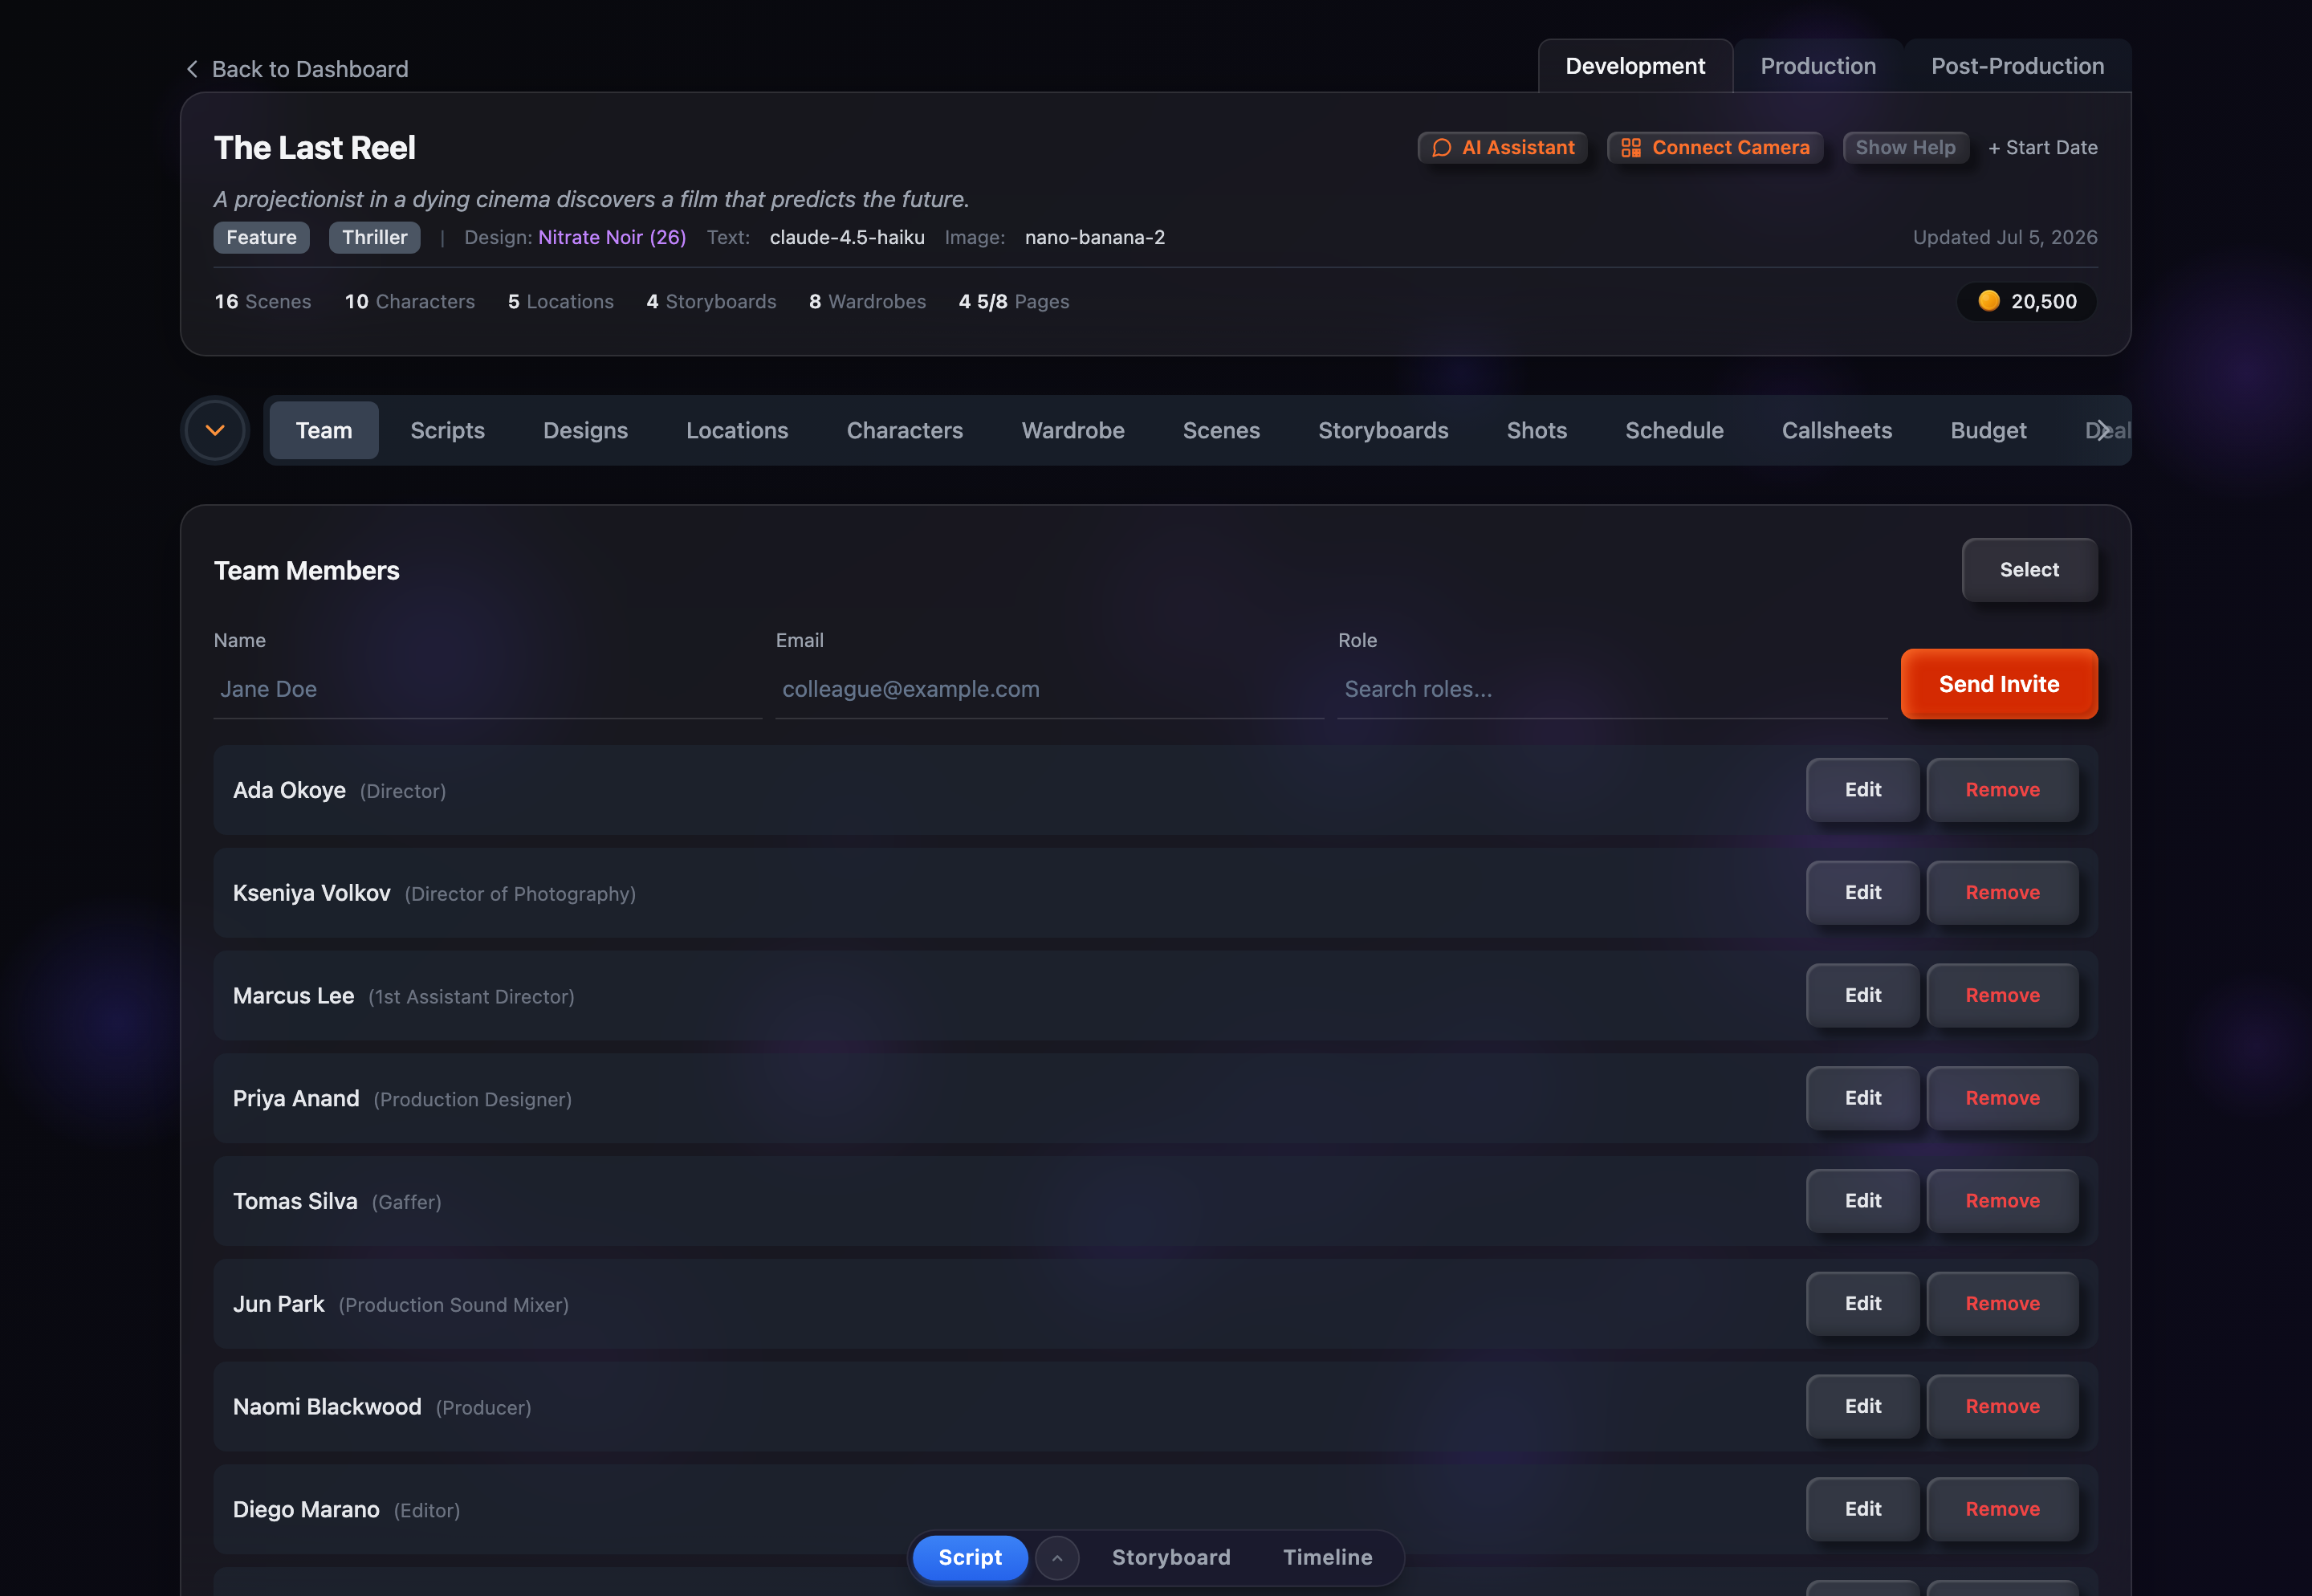
On a Pro project the invitation form sits near the top of the Team tab, just under the Team Members heading and above your roster. It has three fields:
- Name (optional) — the person’s display name. If left blank, the invitation falls back to their email address (and, once they accept, their account name).
- Email (required) — where the invitation link is sent.
- Role — a searchable dropdown of every crew position. Start typing to filter; each result shows the position title and department.
The Send Invite button stays disabled until you’ve entered an email and picked a role, so you can’t send an invitation without assigning a position.
What Happens When You Send
- A unique invitation token is generated with a 7-day expiry.
- An email is sent to the recipient with a link to
/invite/[token]. - The invitation appears in your Pending Invitations list with a “pending” status and a relative timestamp.
Recipient Experience
When the recipient opens the invitation link, they land on the accept page:
- The page shows the project title, the inviter’s name, and the assigned role.
- If they’re not signed in, they sign in first and are returned to the accept page.
- Once signed in, they accept the invitation to join the project.
- Accepting creates a team-member record linked to their user account, and the invitation status flips to “accepted.”
Invitation Statuses
Pending
Sent but not yet accepted; the link is still active. Only pending invitations show in the Team tab’s Pending Invitations list.
Accepted
The recipient signed in and joined. They now have project access and move out of Pending Invitations and into your crew roster as a linked member.
Revoked
You cancelled the invitation before it was accepted. The link no longer works.
Expired
The 7-day window passed without acceptance. The link stops working and the recipient needs a fresh invitation.
Revoking an Invitation
Sent one by mistake? Click Revoke next to any pending invitation. A confirmation prompt appears, and once you confirm, the link immediately stops working and the invitation is marked revoked — no further action needed.
Email Notifications
Two emails accompany the invitation flow:
- Invitation sent: the recipient receives the invite link.
- Team join: you (the inviter) are notified when someone accepts.
Both respect notification preferences, so a recipient or inviter who has opted out of those emails won’t receive them.