 cinemasetfree.com
Uploading & Managing Takes
Takes start out only on this device. Enter Select mode, choose the ones you want, and hit Upload to push them to the cloud — a progress bar tracks each one, and a Retry button appears if any fail. The same select mode lets you bulk-delete takes (restorable later) or restore ones you’ve deleted.
Why Upload?
A freshly recorded take is stored only in this browser, on this device — you’ll see an amber Local badge on its row. That’s fast for on-set review, but it isn’t backed up and teammates can’t see it. Uploading copies the footage to the cloud; the row then also shows a blue Cloud badge, and its label, notes, and circled state sync everywhere.
Uploading Takes
Uploads run from select mode:
When it finishes, a toast confirms how many takes were uploaded and select mode closes. The Upload button is disabled while an upload is already running.
Upload Progress & Retries
While a take uploads, its row shows a blue progress bar with a status line beneath it — Requesting..., Uploading 72%, then Confirming.... If an upload doesn’t go through, the take keeps a red Upload Failed badge and a Retry button appears on its row; click it to try that take again on its own.
Select Mode
Select mode is where all the bulk actions live. Enter it from the Select button, or as a shortcut just click a row’s number to jump straight in with that take ticked. A sticky action bar gives you:
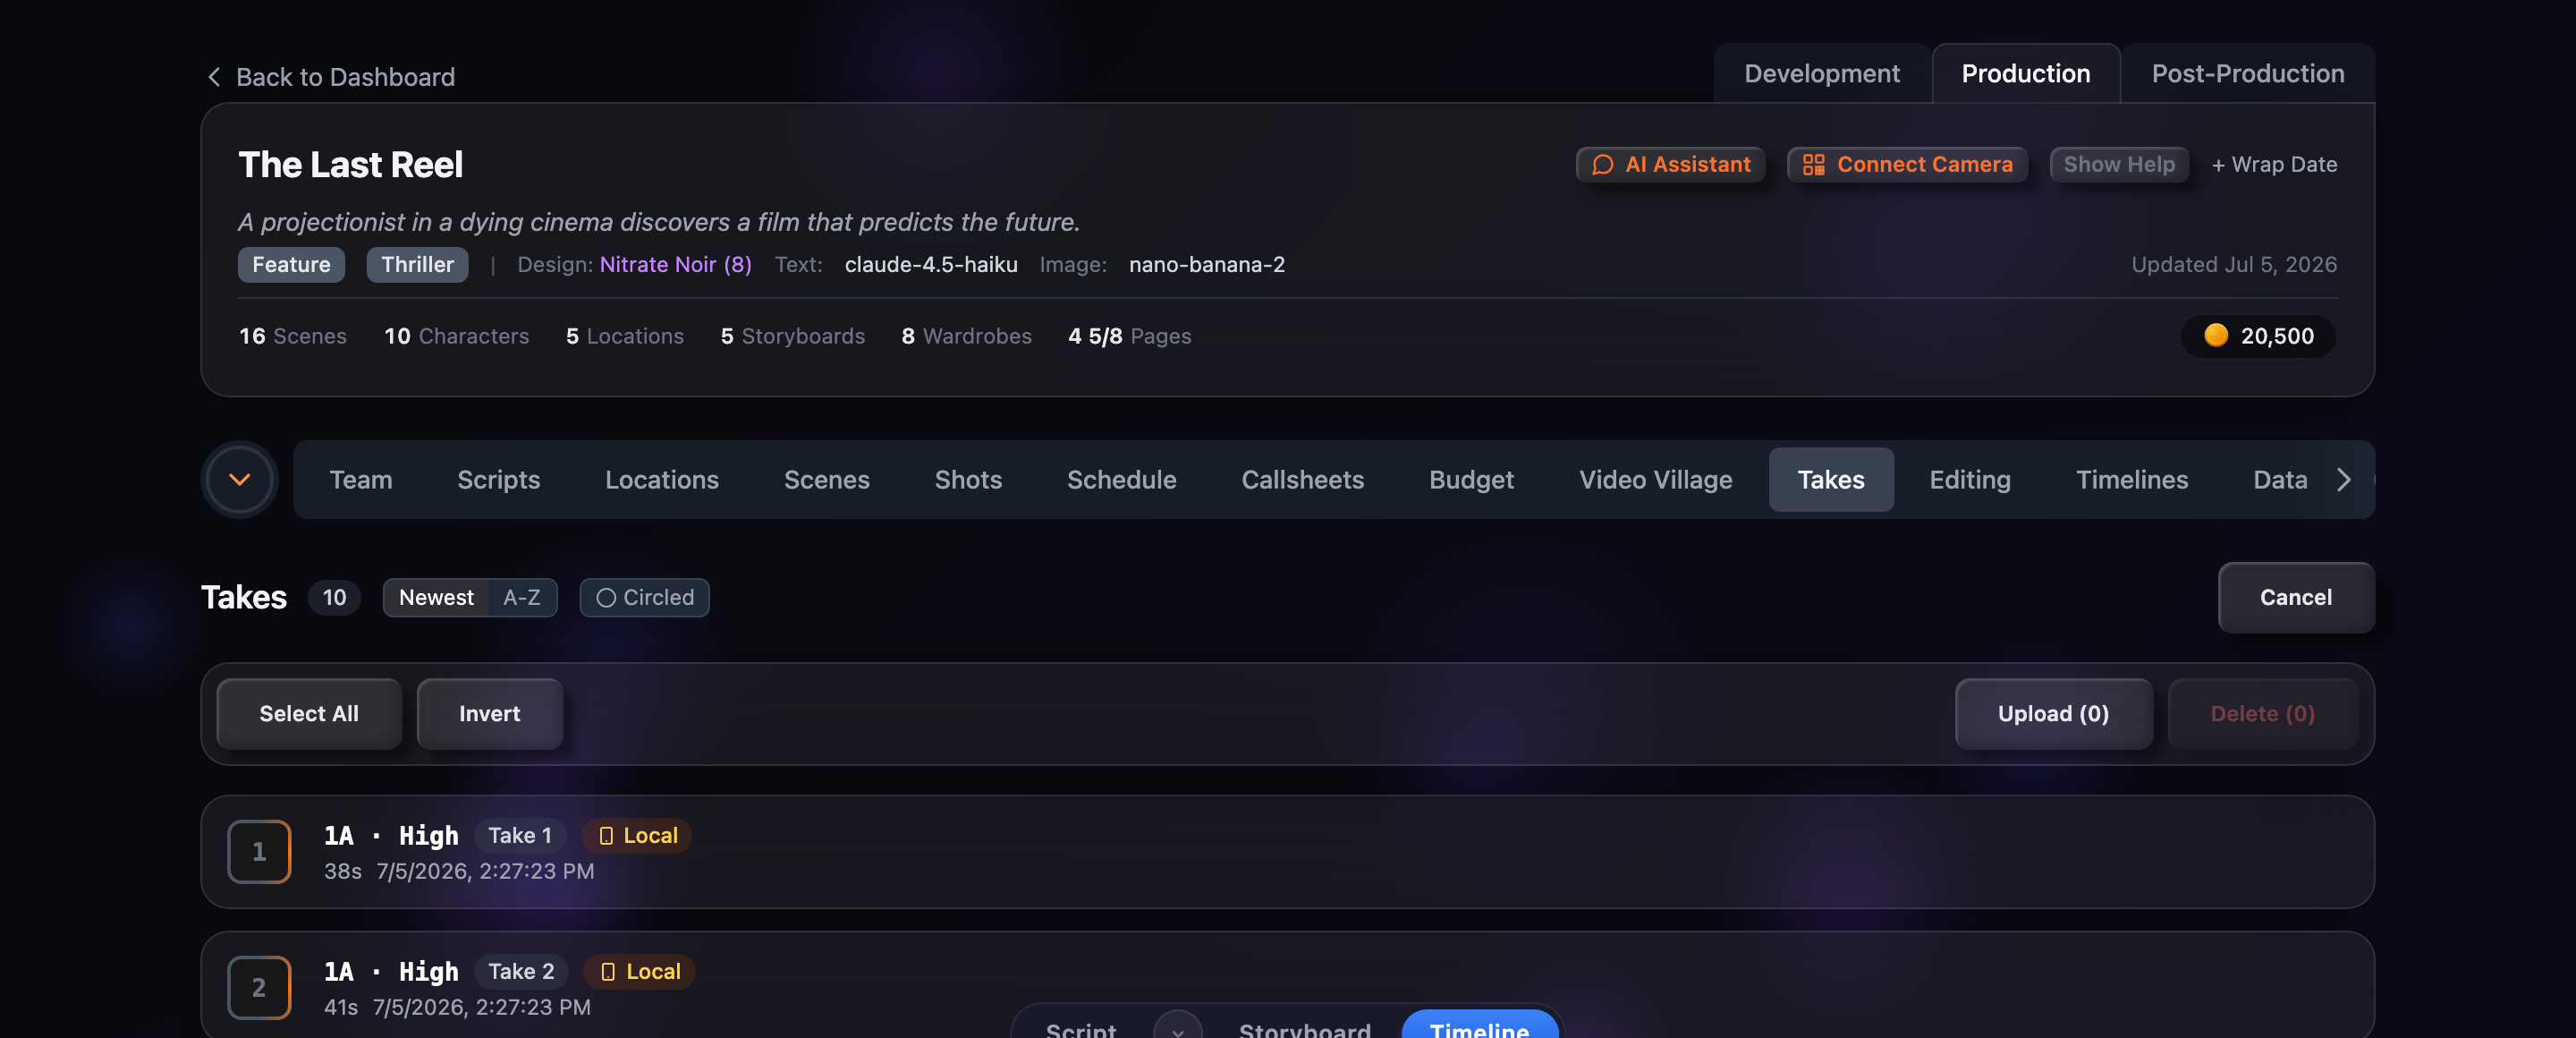
- Select All / Deselect — toggle every take on or off at once
- Invert — flip the selection, keeping what you didn’t have
- Upload (N) — send the selected local takes to the cloud
- Delete (N) — remove the selected takes
Click Cancel to leave select mode without doing anything.
Deleting & Restoring
Deleting a take is a soft delete — nothing is gone for good. Select the takes and click Delete; a confirmation dialog spells out how many you’re removing and reminds you they can be restored later. Confirm, and they drop out of the list.
To get them back, click Show Deleted in the toolbar (it only appears once something has been deleted) to switch to the deleted list. From there you can restore takes one at a time with the green Restore button on each row, or select several and use Restore in the action bar. Once the last deleted take is restored, the view flips back to your live takes automatically.