 cinemasetfree.com
Generating Location Portraits
Open the portrait modal from a location’s thumbnail or its Generate button to create a landscape establishing shot, upload your own image, and browse every version you’ve made. Location portraits default to a 16:9 aspect ratio for cinematic framing.
Opening the Portrait Modal
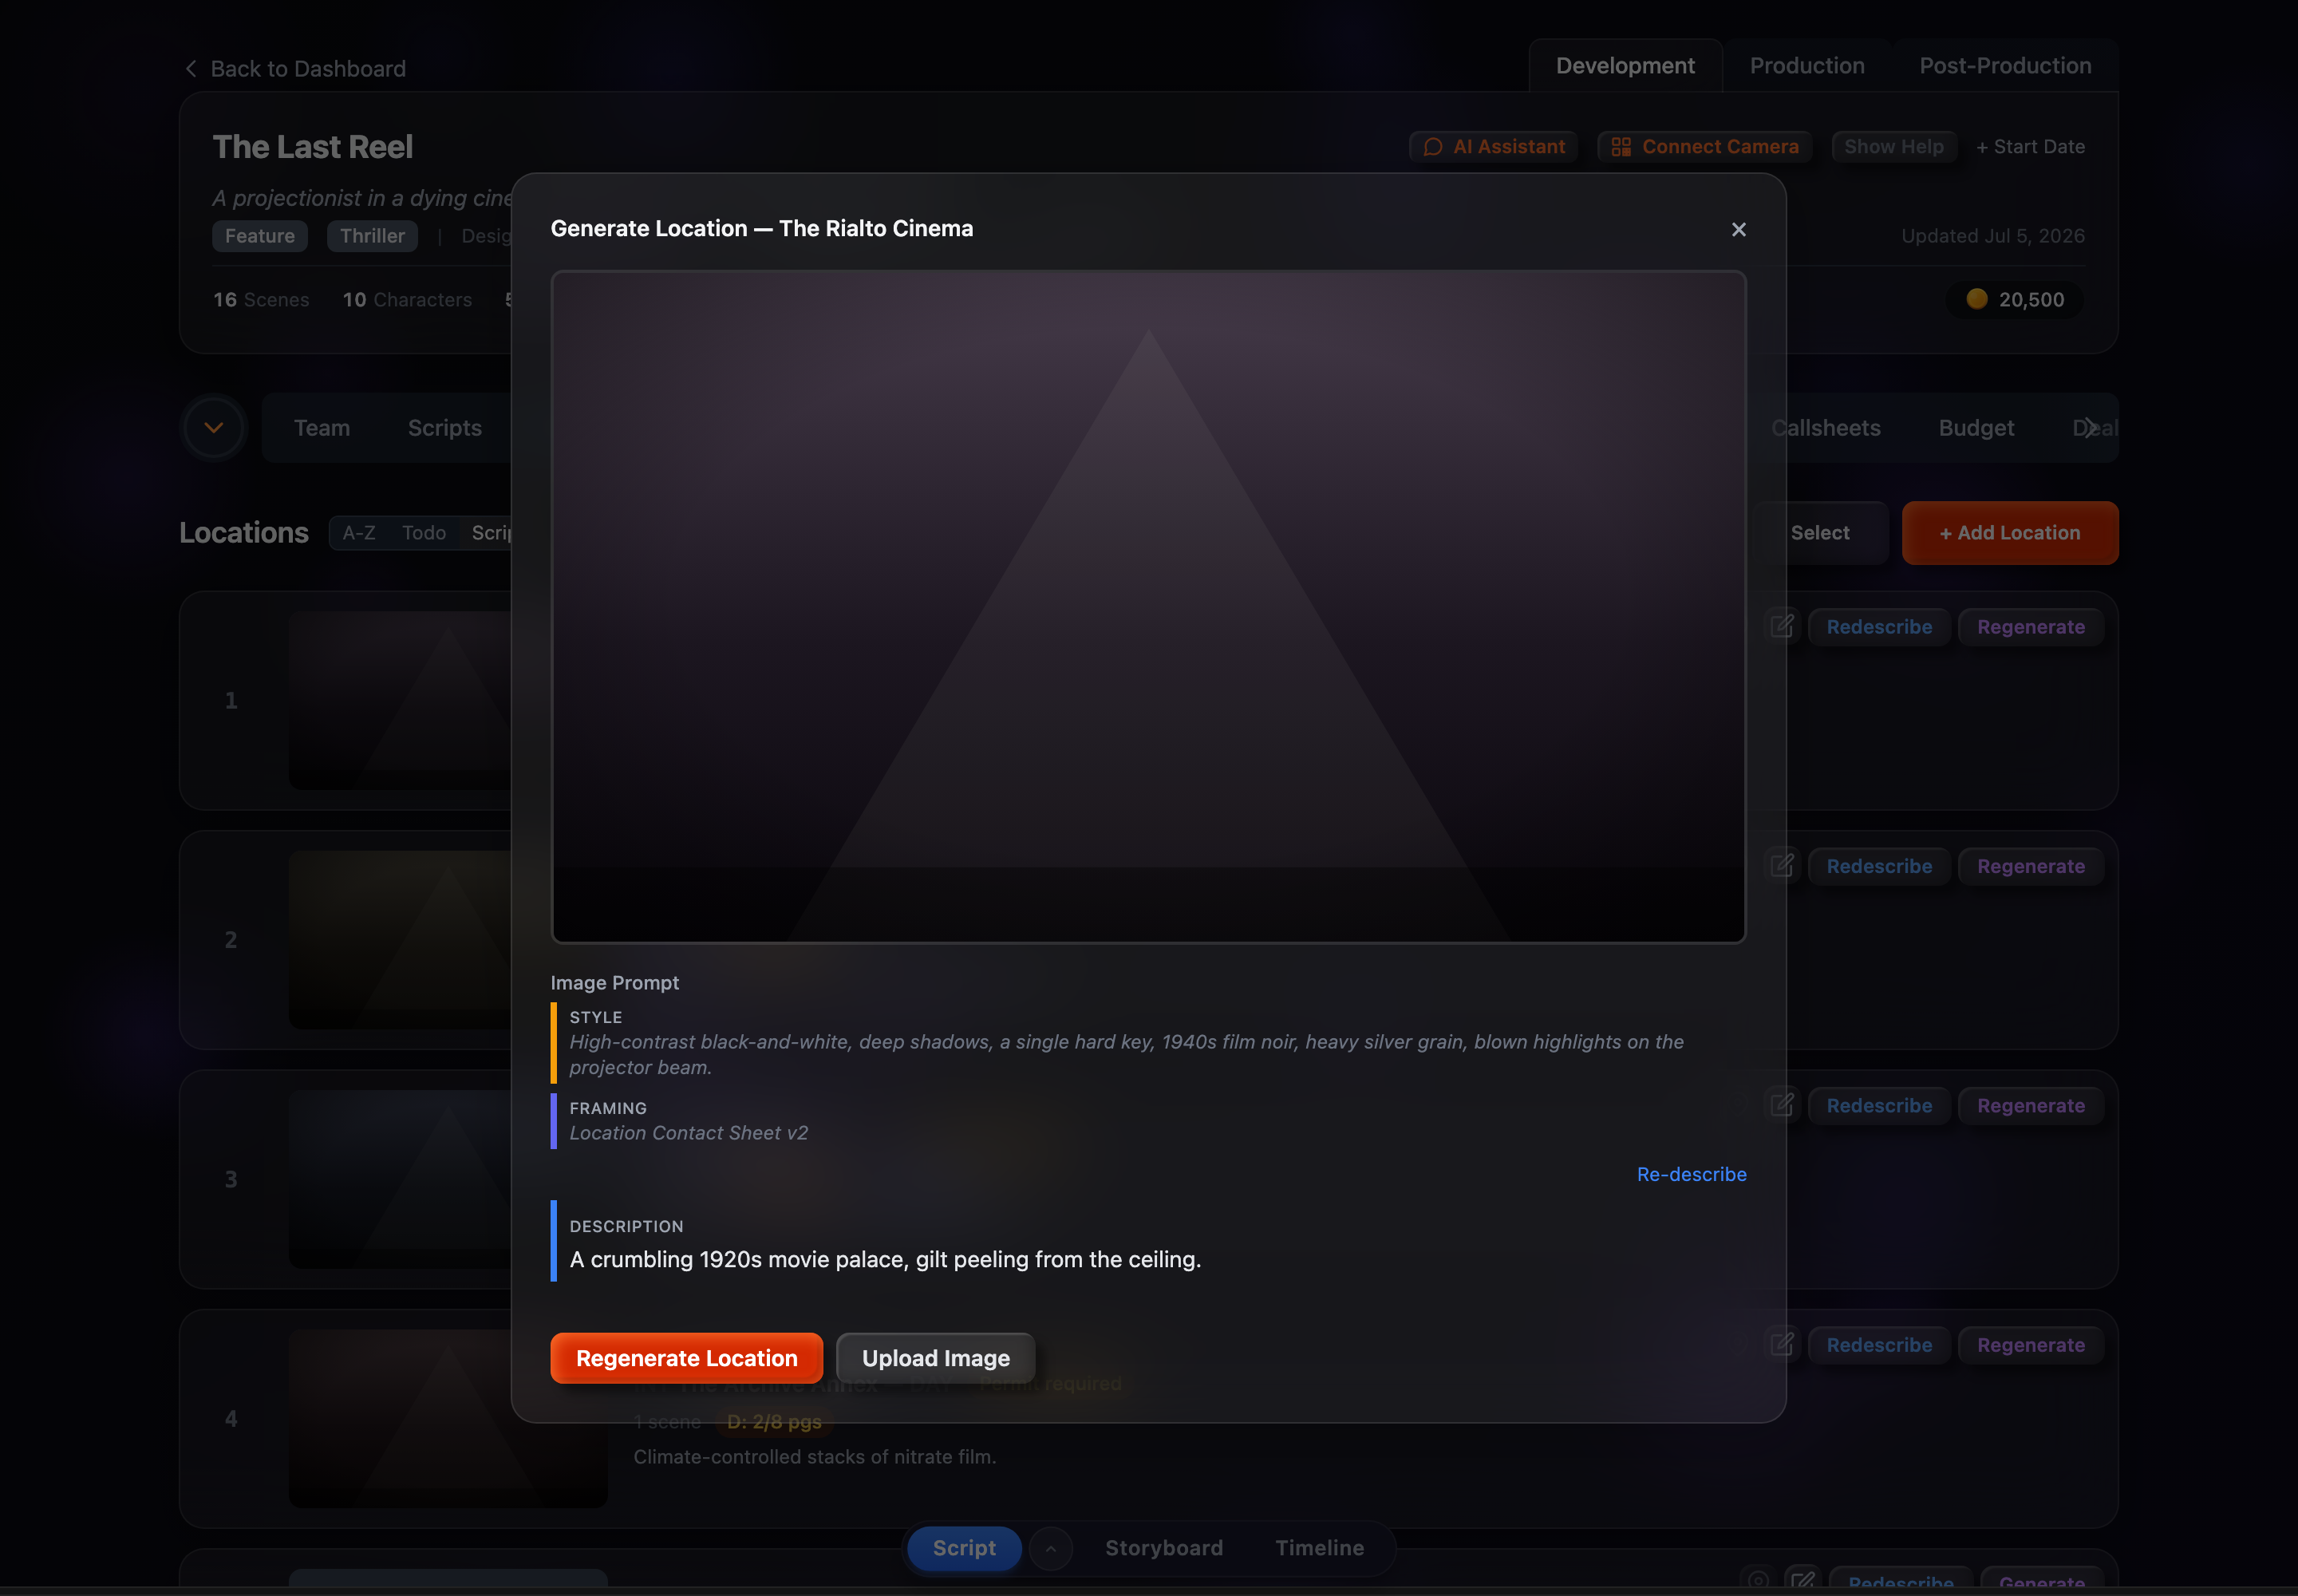
Click a location’s portrait thumbnail, or the Generate / Regenerate button on the row. The modal opens titled “Generate Location — Name,” with the current portrait (if any) filling the top and all the controls stacked below it.
One-Click Generation
For a location that has no description yet, simply pressing Generate (on the row or in the modal) does both steps in one pass: it first writes a description from the scene context, then generates the image from it — the spinner runs straight through. The generated description is saved back to the location so you don’t lose it.
Landscape by Default
Unlike character portraits, location portraits default to a 16:9 aspect ratio — wide, cinematic establishing shots that match standard film framing. If the selected image model exposes aspect-ratio options, you can pick a different ratio in the modal.
Inside the Modal
The landscape modal is a single column: the image preview sits across the top, a strip of version thumbnails appears beneath it once you have more than one, and the generation controls follow:
- Image Prompt — A segmented editor with a Style segment (pulled from the active production design), a Framing segment (from the location template), and an editable Description body you write or auto-fill
- Aspect Ratio — Preset ratio buttons, defaulting to 16:9 (shown when the selected model supports them)
- Generate Location / Regenerate Location — Kicks off the image generation
- Upload Image — Use your own establishing shot instead of generating one
- Estimate — A small line beneath Generate showing the expected credit cost and time
Auto-Describe Inside the Modal
Above the description body is an Auto-describe link (it reads Re-describe once text is present). Click it to generate a description from the location’s scene context — setting, time of day, and the active design’s style — and drop it into the prompt, ready to edit before you generate.
Uploading an Image
You can bring in your own establishing shot three ways:
- Upload Image button — Opens a file picker
- Drag-and-drop — Drop an image file onto the preview area
- Clipboard paste — Copy an image and press Ctrl+V / Cmd+V with the modal open
Uploaded images become versions too, so you can freely mix generated and uploaded shots.
Version History
Every generation or upload adds a new version. When more than one exists:
- Chevron arrows over the image step to the older (left) and newer (right) version
- Thumbnail strip below the image lets you jump straight to any version, each tagged with its version number
- Use this version — The save icon at the bottom-right of the image sets the version you’re viewing as the location’s active portrait
- Model label — When you’re looking at an older version, the model that produced it is shown as a small caption