 cinemasetfree.com
The Timeline Editor
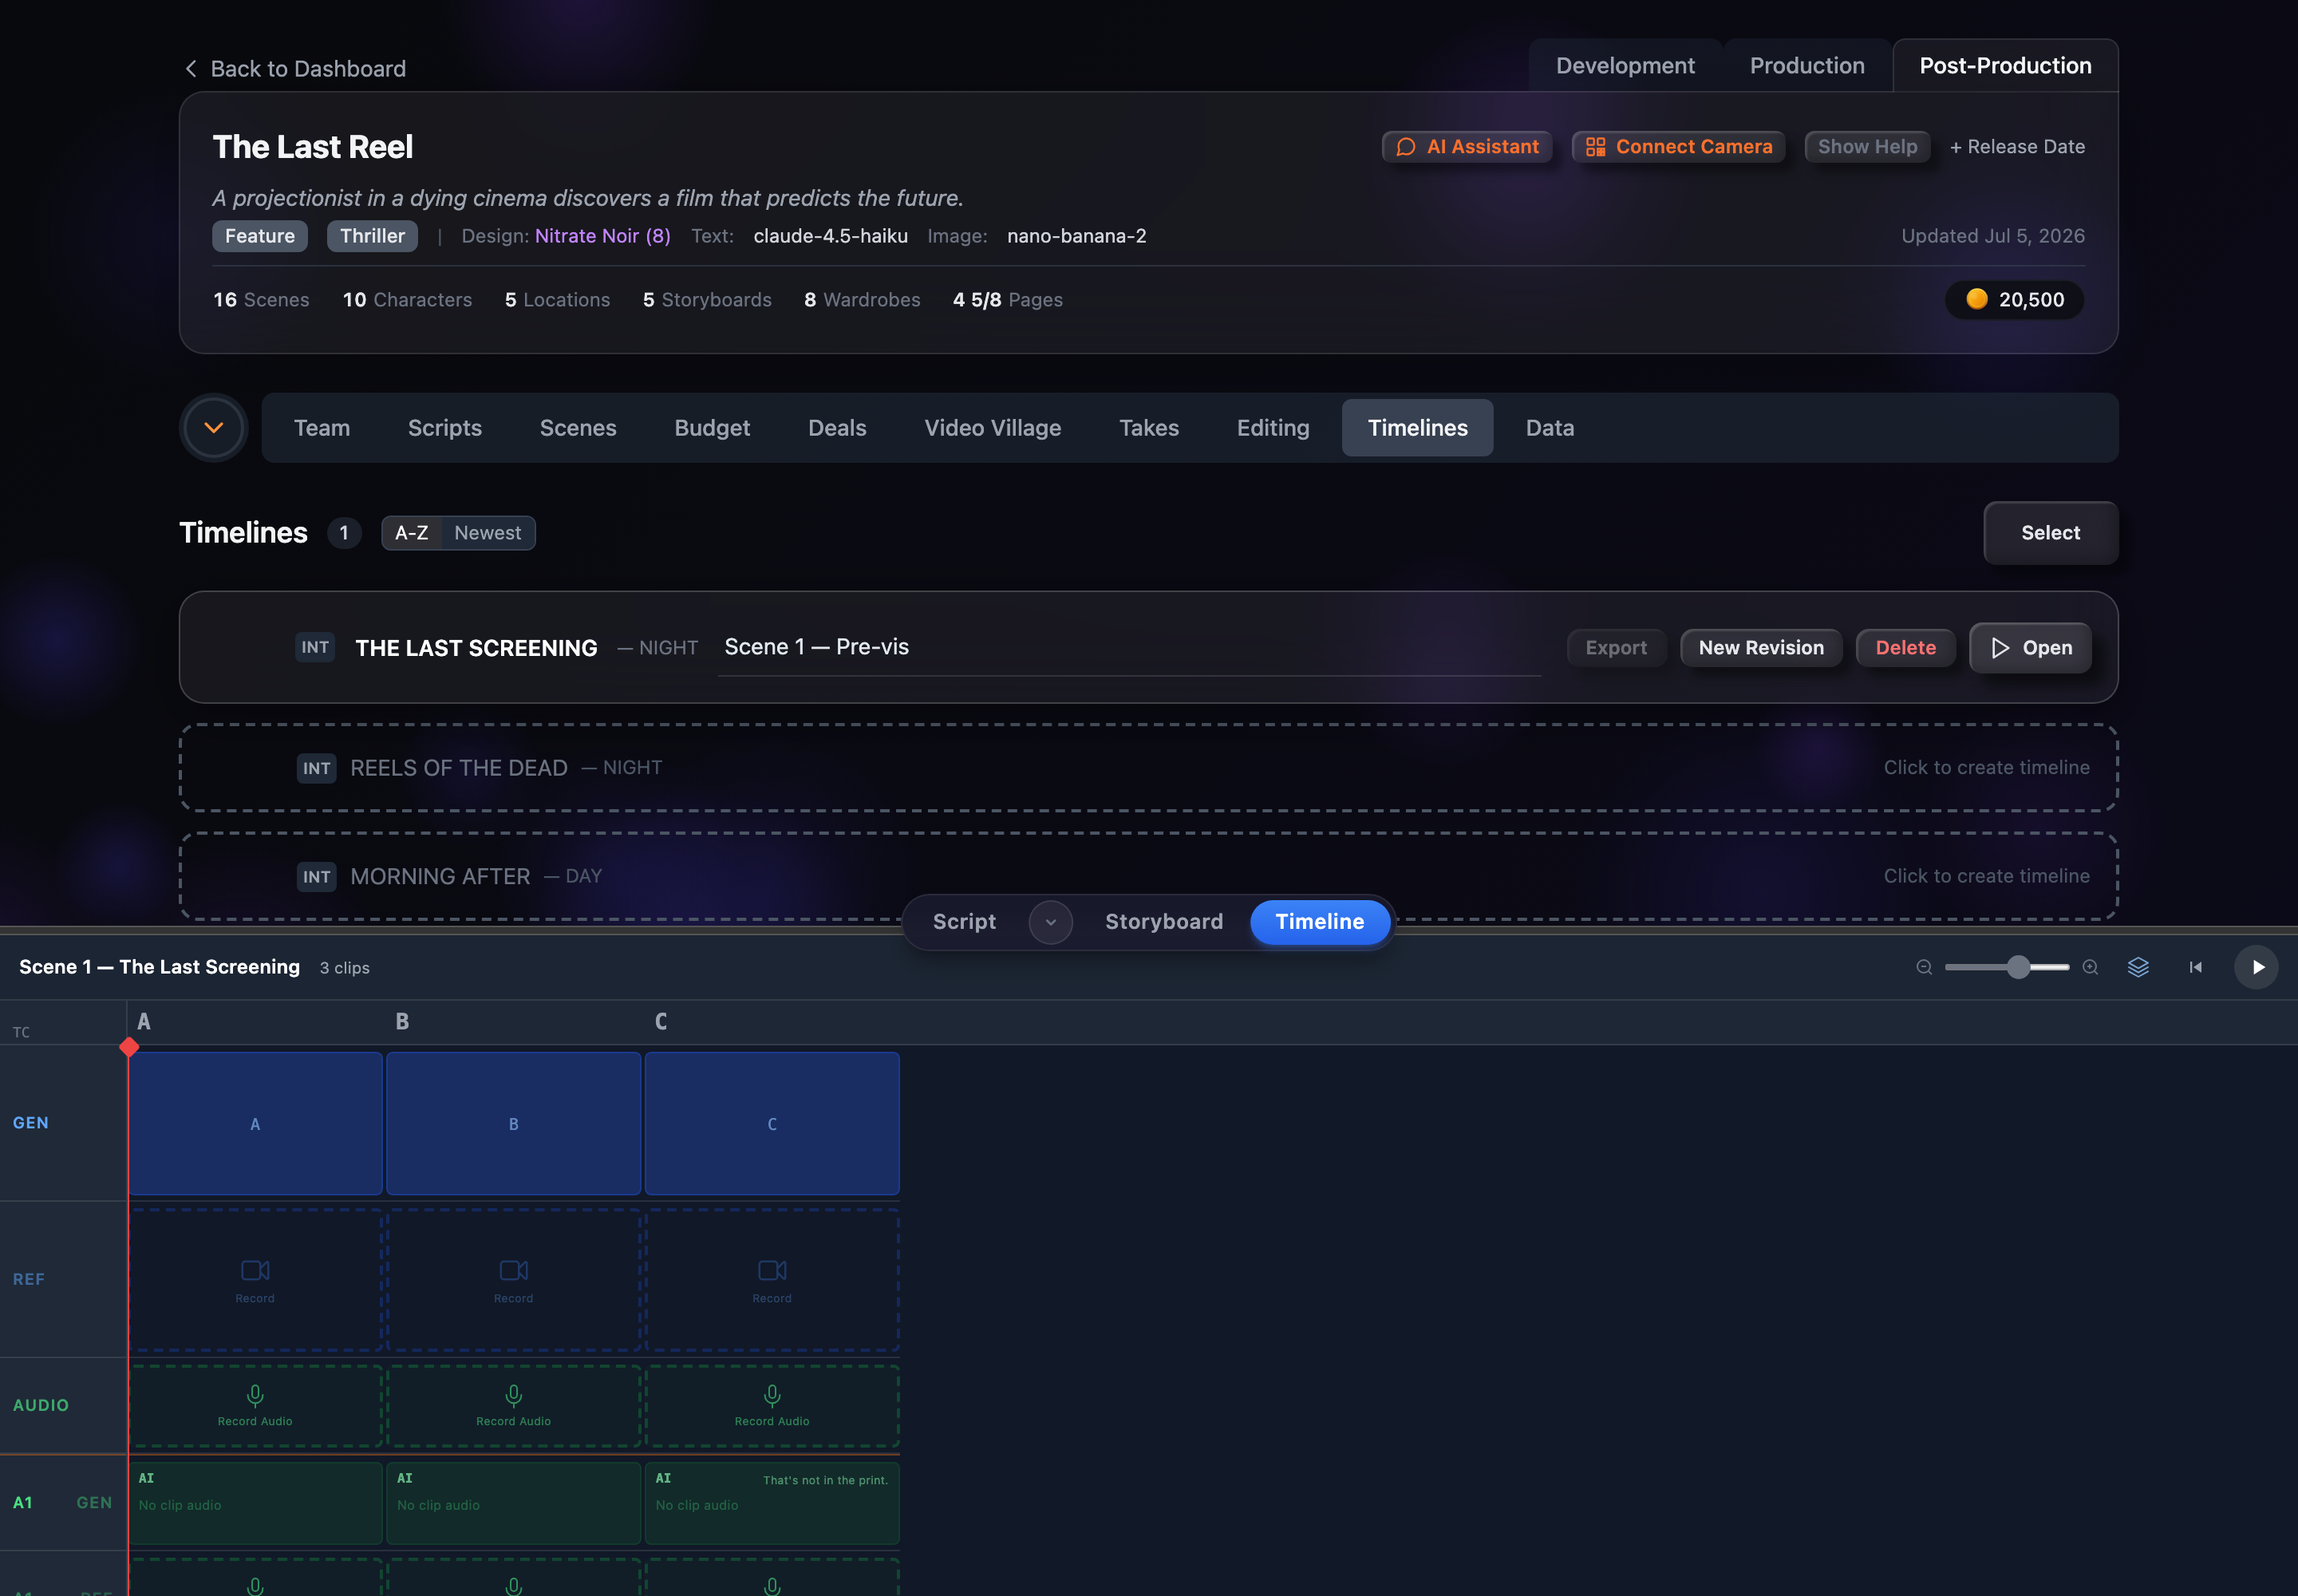
Press Open on a timeline card to launch the edit-bay view. The scene’s shots are laid out left-to-right on the GEN video track. Click a shot to open its clip editor, toggle the reference lanes to record webcam and audio takes, and use the zoom slider and playhead to move through the cut.
Opening a Timeline
On any timeline card, click the Open button (the one with the play triangle) to load that cut into the timeline editor. On mobile, choose Open from the row’s Actions dropdown. The editor shows the scene heading, the cut’s name, and a count of how many shots (clips) are in the scene.
The GEN Video Track
The main row is the GEN track: one cell per shot, laid out in shot order across the timeline. Each cell shows the best thing it has for that shot — it plays the generated or uploaded video inline when one exists (stepping through keyframe segments in order), falls back to the shot’s storyboard panel thumbnail, and shows a lettered placeholder when there’s neither. Shots that carry AI-generated video are tagged with a small AI marker.
If a timeline has no shots yet, the GEN track shows “No shots yet — add shots in the Shot List to populate this timeline.” Add or auto-populate shots in the Shot List and they’ll appear here.
Editing a Shot’s Clip
Click a shot’s cell on the GEN track to open its clip editor. The clicked cell is highlighted, and the editor is where you generate or refine that shot’s video. Click the cell again (or close the editor) to collapse it; when it closes, the track refreshes so any newly generated clip shows up on the timeline.
Reference Lanes
The toolbar has a toggle to show or hide the reference lanes that sit beneath the GEN track. When on, they line up cell-for-cell with the shots above and give you a place to capture reference material:
- REF — a camera-takes lane. Each shot shows its recorded take (with take number, a circled-take marker, and duration), or a dashed Record placeholder that opens the webcam recorder.
- AUDIO — a scene reference-audio lane, with a compact play control per clip or a dashed Record Audio placeholder.
- Per-character audio — below a divider, each speaking character gets a GEN lane (the shot’s generated clip audio, labelled with the character’s dialogue line) and a REF lane for recording that character’s reference audio.
Click a dialogue label on a GEN audio lane to pop open the character’s full line in an overlay — handy when the lane cell is too narrow to read it.
Recording Takes
The dashed placeholders in the reference lanes are how you record. Click a shot’s REF placeholder to open the webcam recorder and capture a reference performance for that shot; click an AUDIO or per-character placeholder to open the audio recorder. Once recorded, the cell fills with the take, and a + new control lets you record another version over the top.
Zoom & Playhead
A zoom slider in the toolbar sets how wide the clips are drawn, so you can spread the cut out or squeeze the whole scene into view. A red playhead runs down the track — click anywhere on the ruler to move it — and the transport buttons let you jump back to the start. A timecode (TC) ruler with shot letters runs across the top so you can keep your place.