 cinemasetfree.com
Generating Scene Portraits
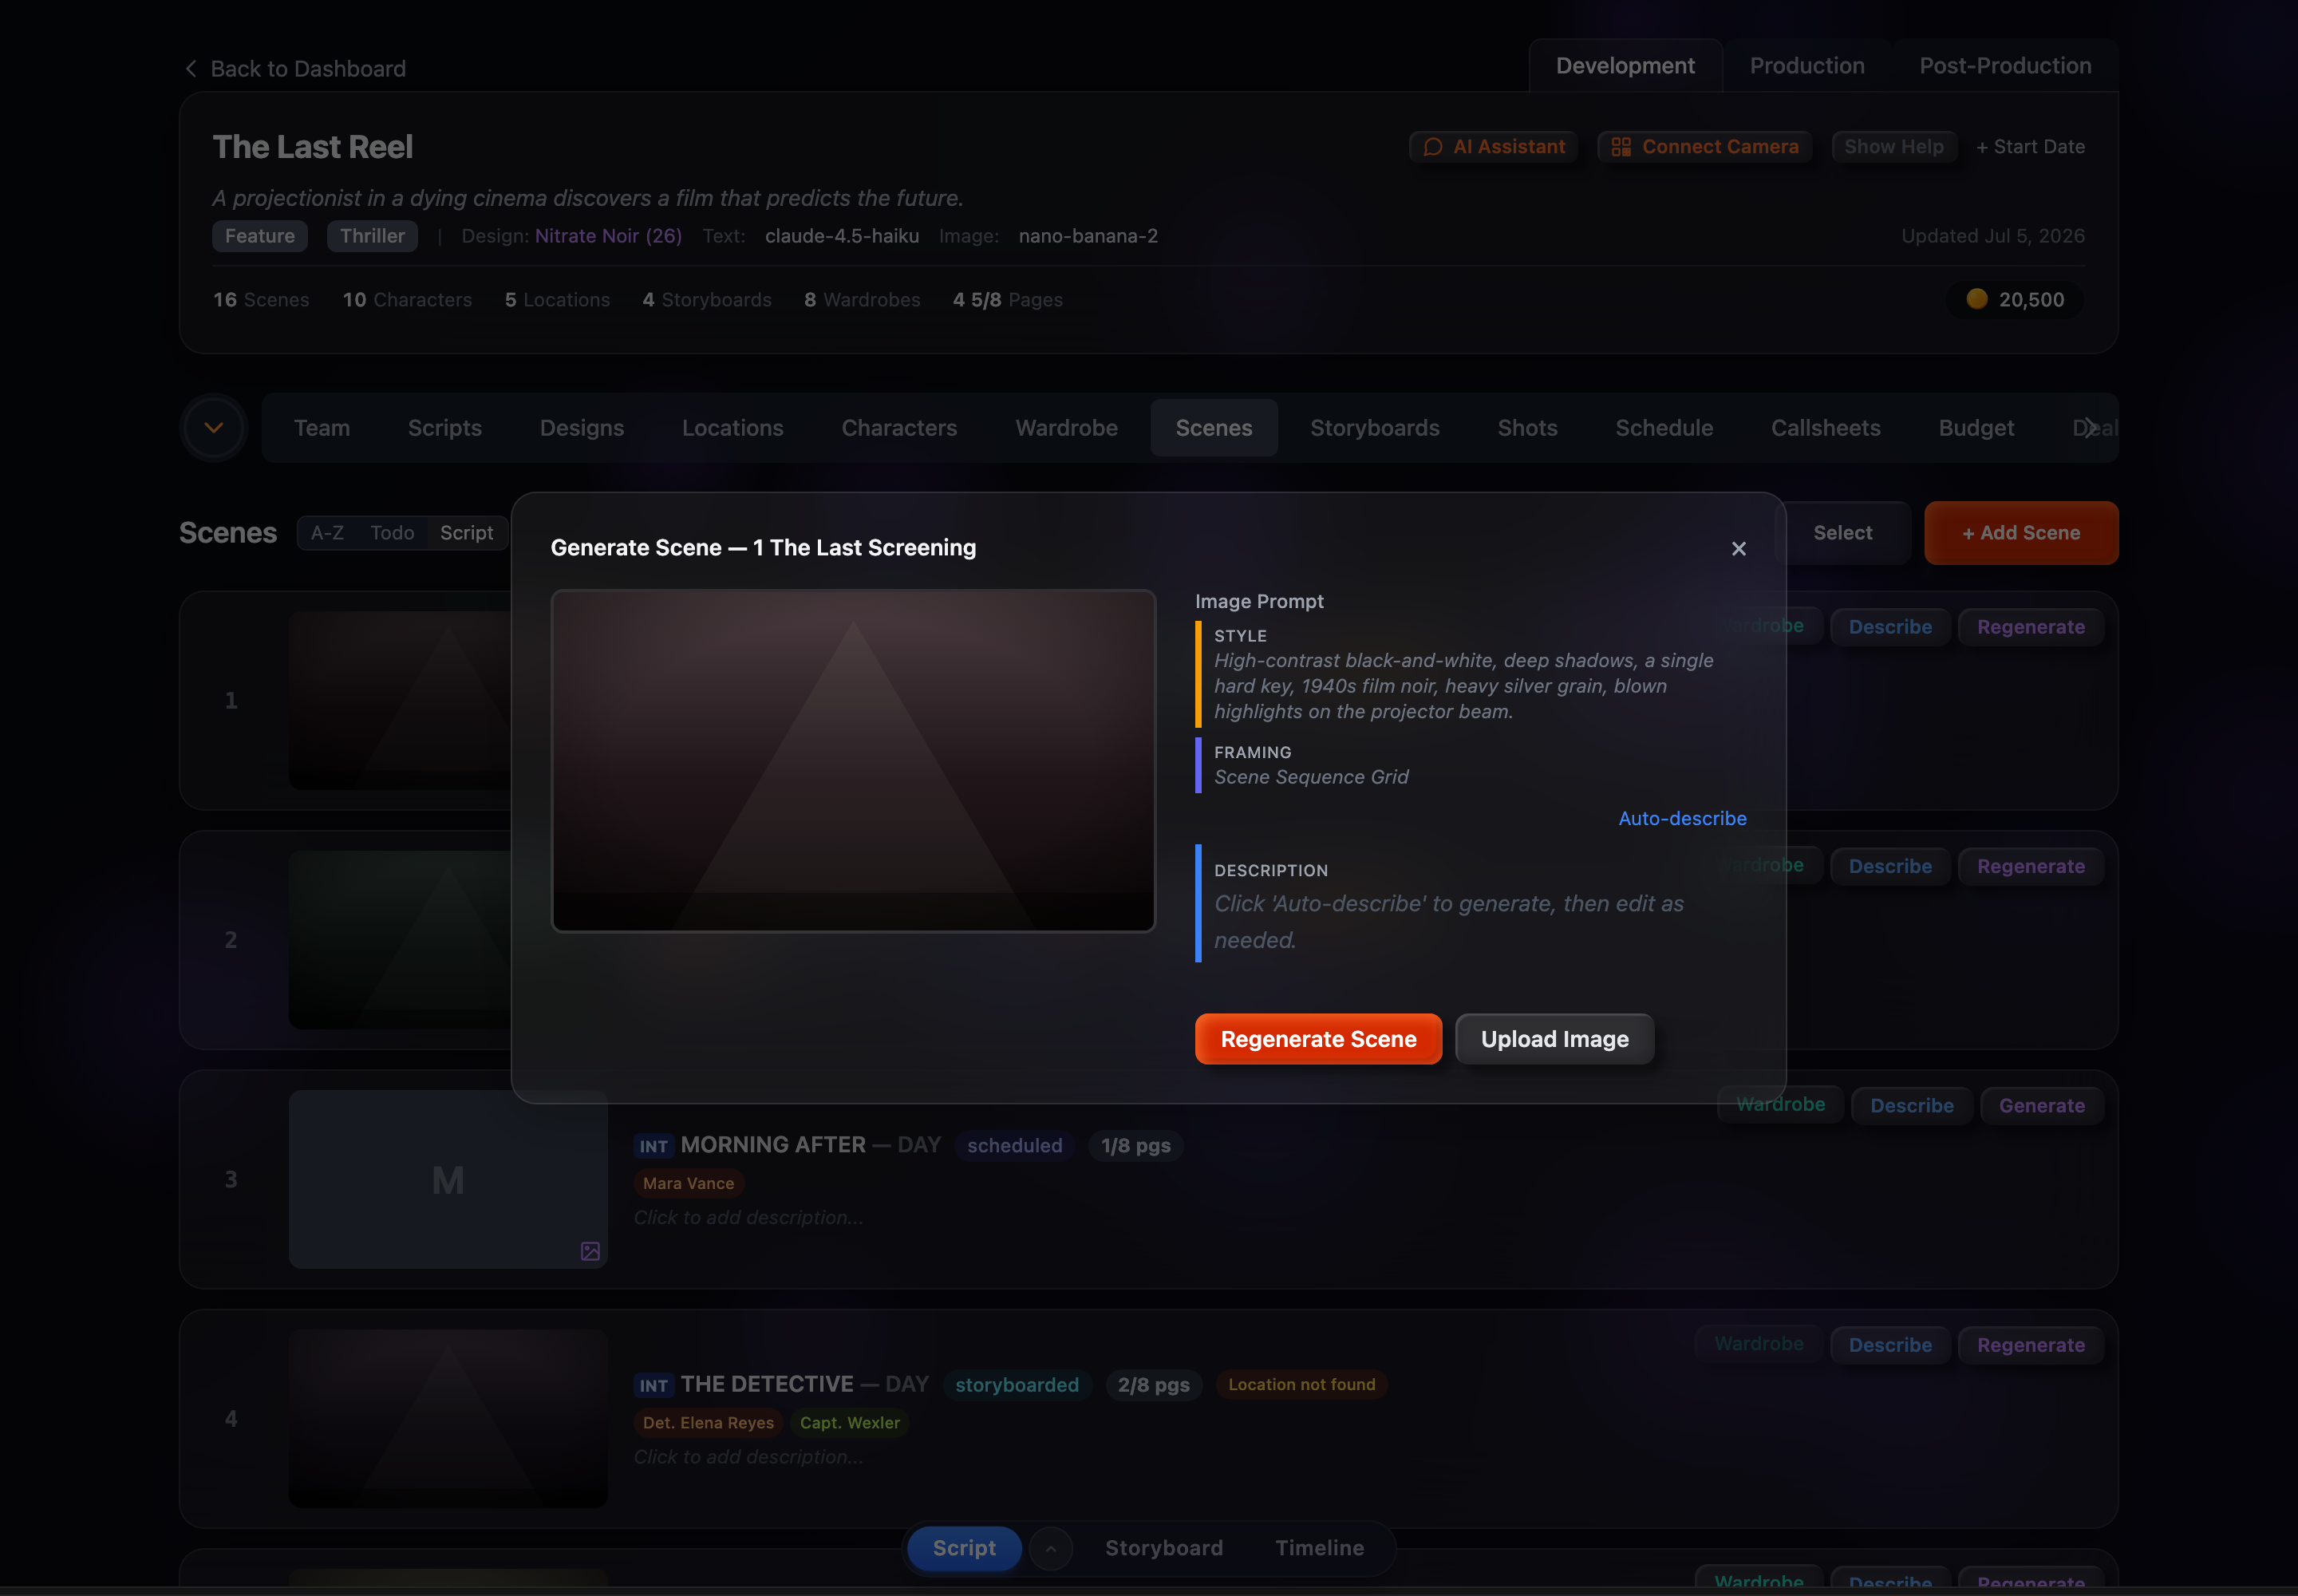
Open the scene portrait modal to generate a 16:9 cinematic establishing shot. If the scene’s location already has a portrait, the app automatically passes it as a reference image so the scene matches the location. You can also upload your own image and browse every version you’ve made.
Opening the Portrait Modal
Click a scene’s portrait thumbnail, or the Generate / Regenerate button on its row. The modal opens with the title “Generate Scene — {scene number and title}”, showing the current portrait (if any) on the left and the generation controls on the right.
Shortcut: clicking Generate directly on a row that has no description yet will auto-describe it first and then generate the image in one continuous step — you don’t have to open the modal at all.
Landscape Orientation
Scene portraits default to a 16:9 landscape aspect ratio, producing wide cinematic establishing shots — the same orientation used for location portraits.
Location Reference Image
This is the part unique to scene portraits. When the scene’s location matches one of your project locations that already has a portrait in the active production design, that portrait shows up under Reference Images in the modal (labeled with the location name and time of day) and is sent along with the generation request. It keeps the scene’s establishing shot visually consistent with the location it belongs to.
If the scene has no linked location, or that location has no portrait yet, no reference is sent. For the best results, generate your location portraits first — the scene will then inherit the location’s look.
The Image Prompt
The Image Prompt is shown as a set of labeled segments rather than one long text box:
- Style — A read-only chip pulled from the active production design (edit it in the Designs tab). It only appears when the design has a style prompt set.
- Framing — A read-only chip naming the establishing-shot template that wraps your description (edit it in the Designs tab).
- Description — The editable part. This is the scene’s visual description, and it’s the only segment you type into here.
Behind the scenes those pieces are assembled into a single prompt of the form “Cinematic establishing shot of a film location: {your description}. No words, text, or lettering anywhere in the image.”
Auto-Describe Inside the Modal
Just above the prompt is an Auto-describe button (it reads Re-describe once there’s text, and Generating… while it runs). It writes a visual description from the scene heading — setting, location, and time of day — and fills in the Description segment for you, so you can go from an empty scene to a ready-to-generate prompt in a click.
Aspect Ratio & Model
Below the prompt, an Aspect Ratio picker lists the ratios your selected image model supports, with 16:9 highlighted as the scene default. The scene portrait uses whichever image model is currently selected for your project, and a short line under the Generate button estimates the cost and time for that model before you commit.
Uploading Your Own Image
Prefer to bring your own establishing shot? You can add one three ways:
- Upload Image button — Opens a file picker
- Drag-and-drop — Drop an image file onto the portrait area
- Clipboard paste — Copy an image and press Ctrl+V / Cmd+V anywhere in the modal
Browsing Versions
Every generation or upload is kept as a version. Once a scene has more than one, the modal gains version controls:
- Older / Newer chevrons — Left and right arrows over the image step back and forth through the history
- Thumbnail strip — A row of version thumbnails (v1, v2, …) below the image, with the one you’re viewing highlighted — click any to jump to it
- Use this version — A save icon in the bottom-right corner of the image sets the version you’re viewing as the scene’s active portrait
When you’re browsing versions, the model that produced the one on screen is shown as small text above the prompt.