 cinemasetfree.com
Creating & Managing Designs
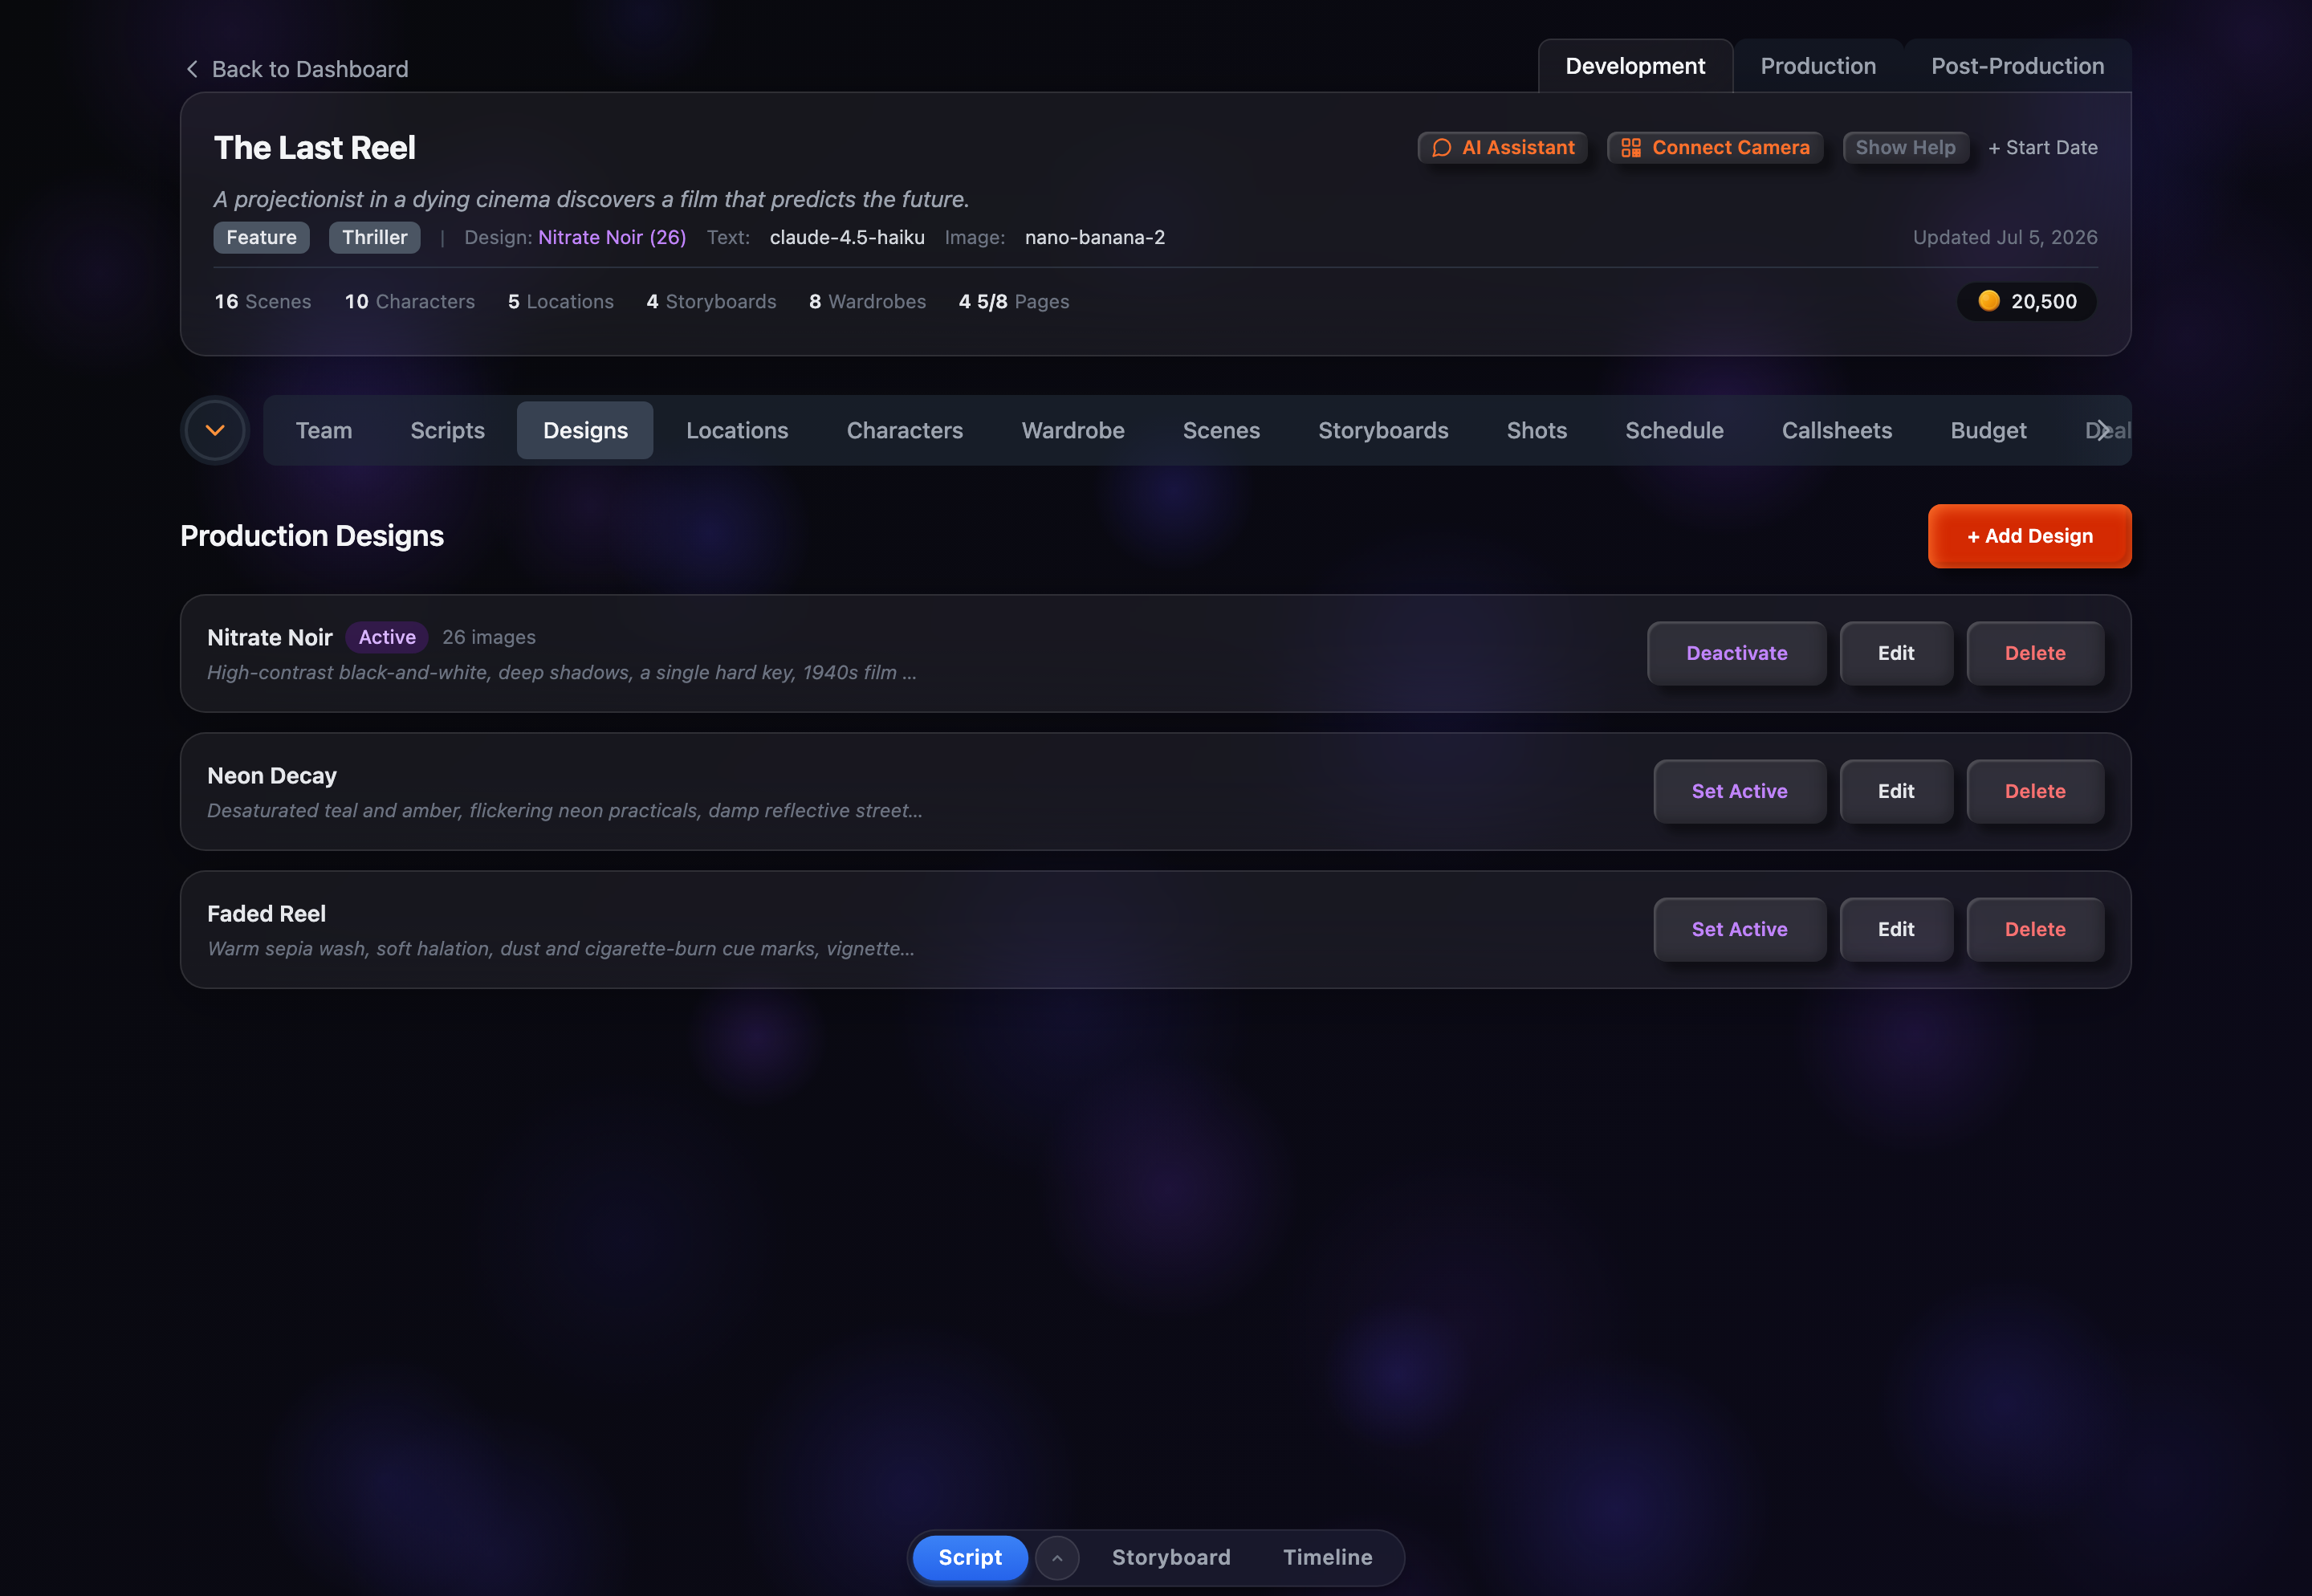
Use + Add Design to create a design with a name and style prompt. Then use Edit to fine-tune it across the Text, Image, and Video tabs, Set Active to make one the project’s current style, and Delete to soft-delete designs you can restore later.
Adding a Design
Click the + Add Design button at the top-right of the Designs tab to open an inline form with three fields:
- Name (required) — a descriptive label for this design.
- Style Prompt (required) — the visual style applied when generating images under this design.
- Text System Prompt (optional) — a system prompt that steers text generation (for example, auto-described character or scene copy) for this design.
Click Create Design to save or Cancel to discard. Both Name and Style Prompt are required — the new design card appears immediately, and you can refine everything else afterward with Edit.
Editing a Design
Click Edit on any design card to expand it into an inline editor. The Name field is always shown at the top; below it, a tab bar switches between three groups of settings:
- Text — the text system prompt and the text model used for auto-describing entities, plus an Advanced Settings button for that model.
- Image — the Style Prompt, per-entity framing templates (Character, Scene, Location, Wardrobe), the image model, and buttons for Advanced Settings and (when the chosen image model supports them) LoRA Integrations.
- Video — a video prompt template and video model, with their own Advanced Settings. The Video tab is a Pro feature and shows a “Pro” badge on plans without video access.
Edits are not saved as you type. Click Save at the bottom of the editor to persist your changes, or Cancel to discard them. Name and Style Prompt must both be filled in to save.
Setting the Active Design
Click Set Active on any design card to make it the project’s active design. Only one design can be active at a time, so activating a design replaces the previously active one. The active card gains a purple ring and an Active badge to set it apart.
To turn it off, click Deactivate — the button that replaces Set Active on the active card. This leaves the project with no active design until you set another.
On desktop, Set Active/Deactivate, Edit, and Delete appear as buttons on each card. On smaller screens they collapse into a single Actions dropdown on the card.
Deleting & Restoring
Click Delete on a design card and confirm in the dialog that appears. Designs are soft-deleted — they are hidden rather than permanently removed, so you can bring them back.
When a project has deleted designs, a Show Deleted toggle appears at the top of the tab with a count of how many. Toggle it on to reveal the deleted cards, which show with a red border and reduced opacity. Click Restore on any deleted card to return it to the active list.
Reading a Design Card
Each card summarizes its design at a glance: the name, the “Active” badge if it is the current design, and an image count showing how many portraits have been generated under it. Below the name you’ll see a truncated preview of the style prompt, and — when set — the text system prompt, text model, and prompt template. Hover a truncated line to see its full text.