 cinemasetfree.com
Departments & Line Items
TL;DR — Your budget ships with 24 standard departments. Add your own with a single name field, rename any department by double-clicking it, and edit line items inline — description, unit, rate, multiplier and actuals — with delete-and-restore built in.
The 24 Default Departments
The first time you open Budget, these industry-standard departments are created for the project, numbered 100–510:
100 — Story & Rights
110 — Producing
120 — Directing
130 — Cast
200 — Production Staff
210 — Camera
220 — Art Department
230 — Set Construction
240 — Set Operations
250 — Electrical
260 — Special Effects
270 — Set Dressing
280 — Property
290 — Wardrobe
300 — Makeup & Hair
310 — Sound
320 — Locations
330 — Transportation
400 — Editing
410 — Music
420 — Post Sound
430 — Post Visual Effects
500 — Insurance
510 — General & Administrative
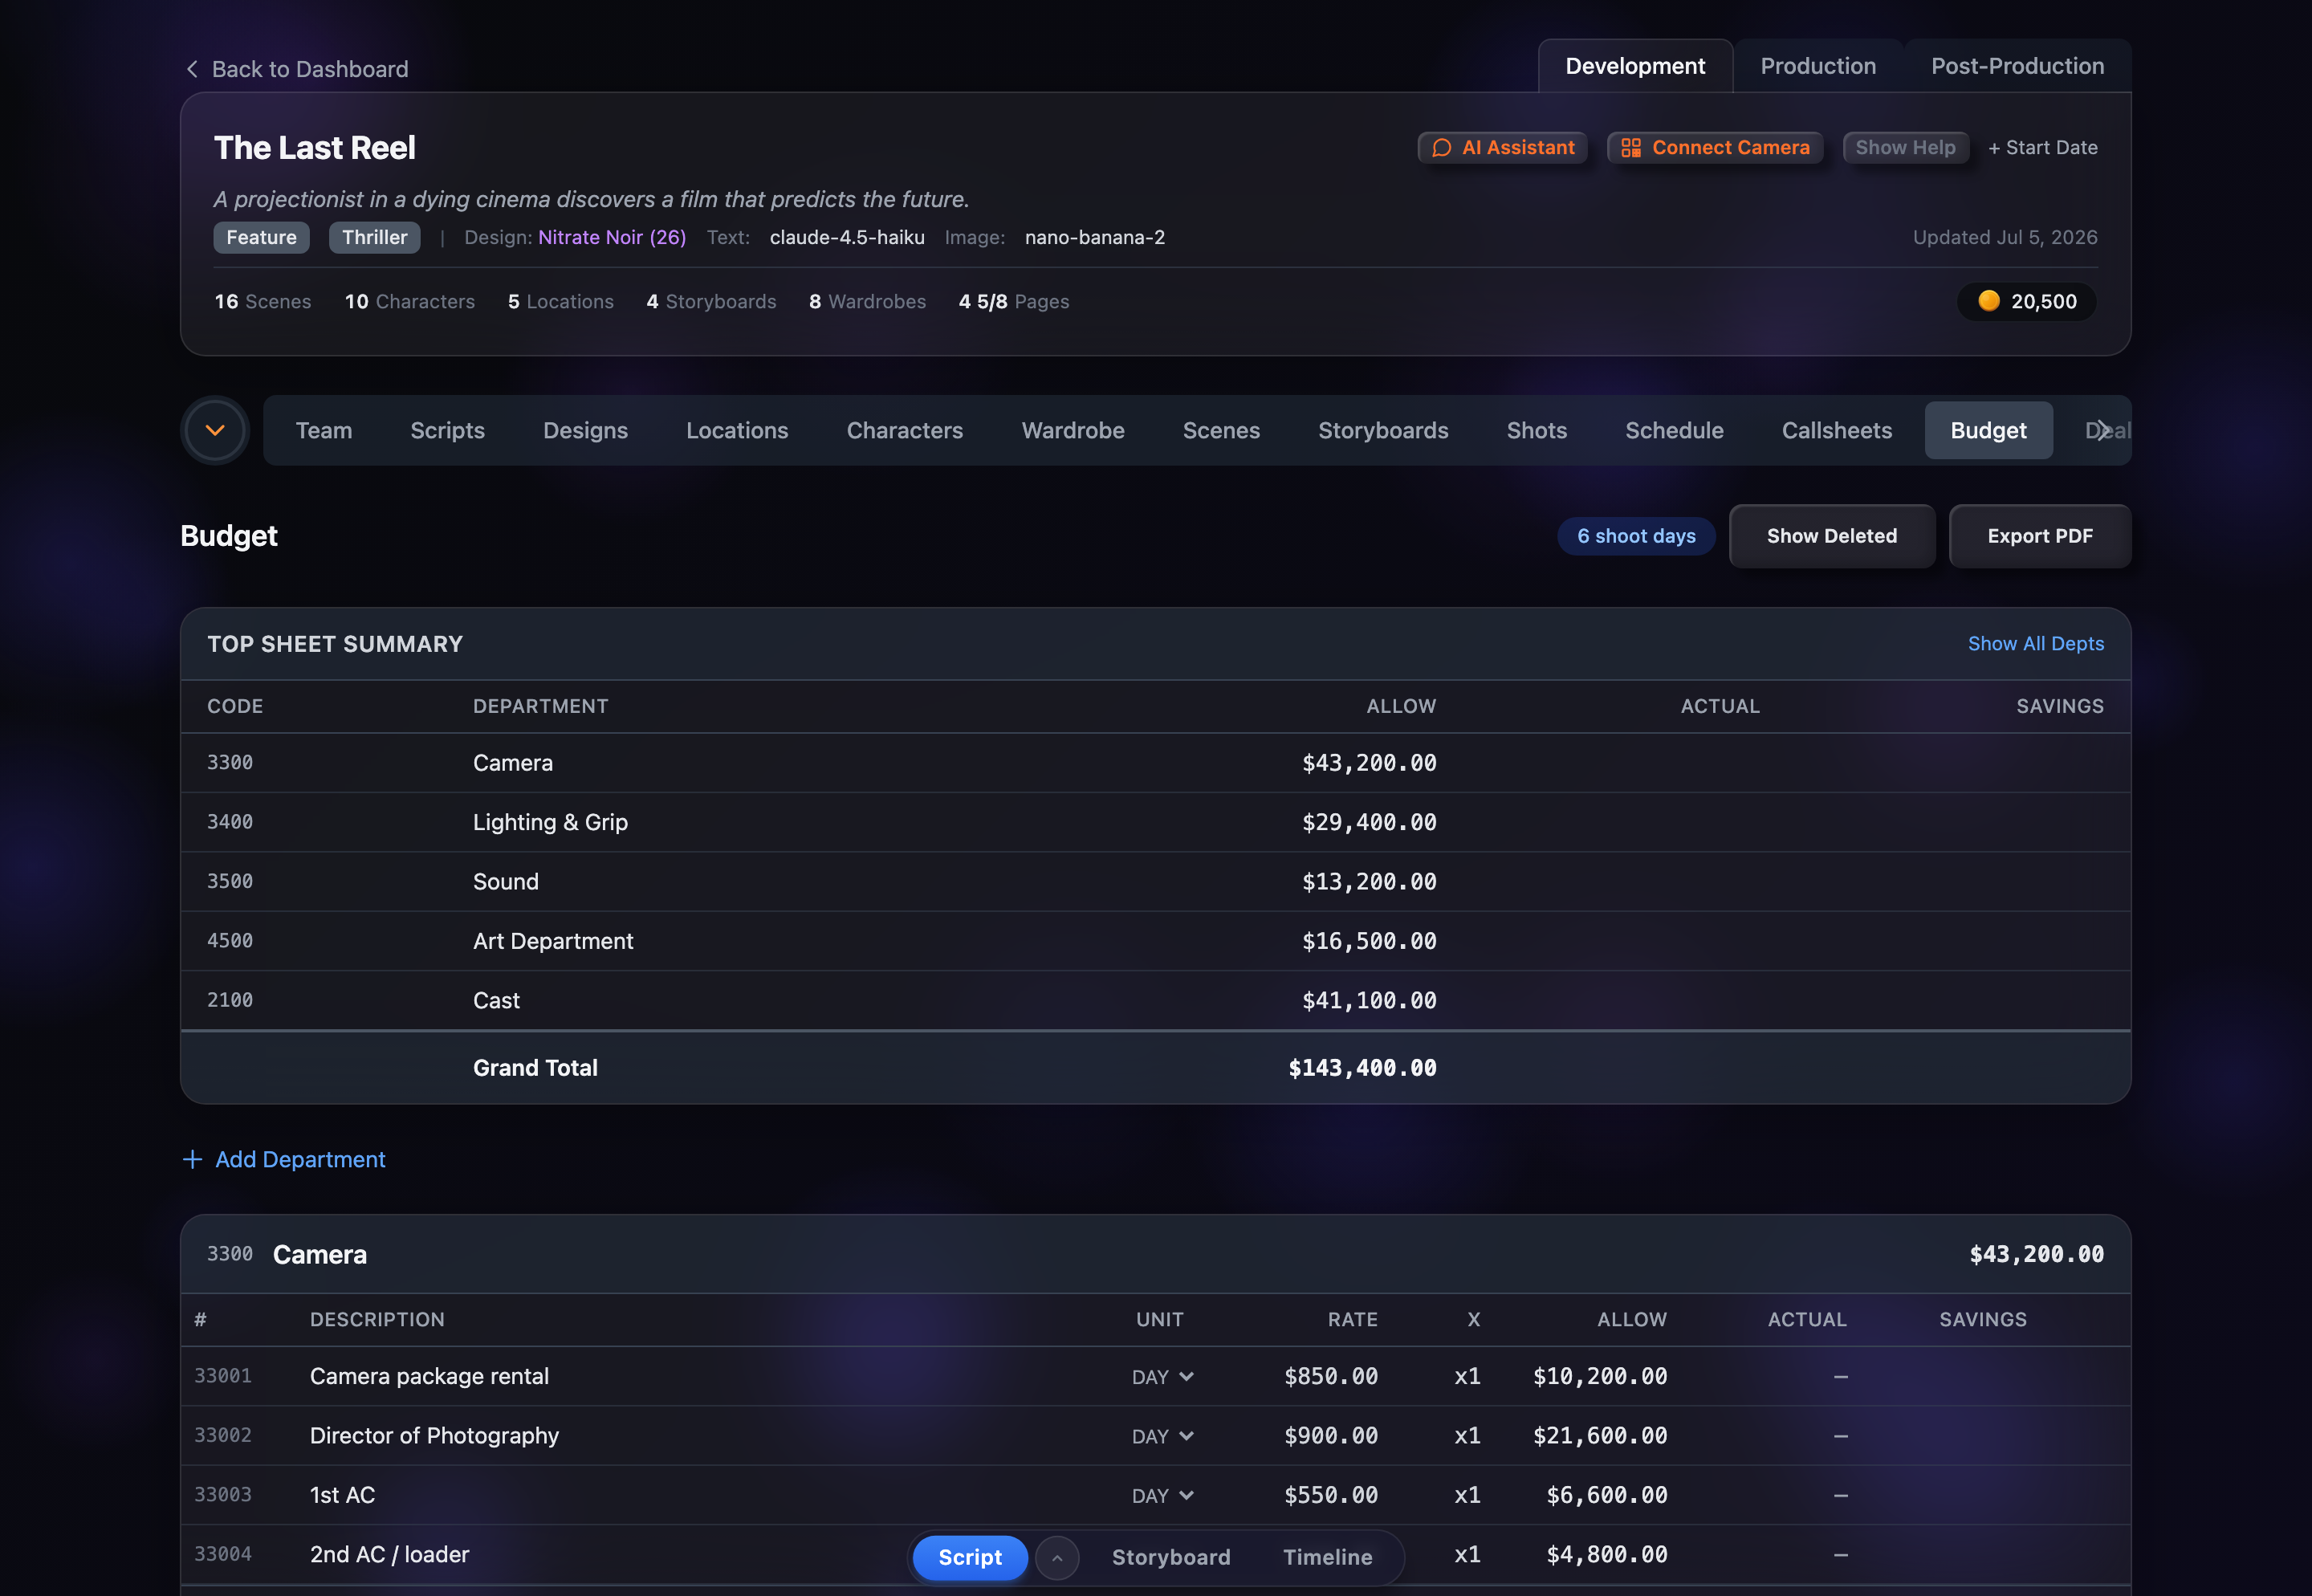
Showing and Expanding Departments
Departments with line items are expanded automatically. To reach the rest, click Show All Depts in the Top Sheet Summary to list every department, then click a row to expand its card and jump to it. Toggle Hide Empty to collapse the summary back to just the departments you’re using.
Creating Custom Departments
Need something that isn’t in the defaults? Click Add Department below the Top Sheet Summary, type a name (for example “Visual Effects”), and confirm. You only supply the name — the department code is assigned for you automatically. Custom departments carry a small custom tag and behave exactly like the built-in ones. Only custom departments can be deleted (via the trash icon in their header); the 24 defaults can’t be removed.
Renaming a Department
Double-click a department’s name in its card header to edit it in place. Press Enter to save or Esc to cancel. This works for both default and custom departments.
Line Item Columns
Inside an expanded department, each line item is a row you edit directly — click a cell, type, then click away or press Enter to save. The columns are:
- Description — what the expense is (e.g. “Director of Photography”)
- Unit — a dropdown: day, week, or flat
- Rate — the cost per unit
- × — the multiplier (e.g. number of shoot days)
- Allow — the estimated total, calculated for you as quantity × rate × multiplier (read-only)
- Actual — what you really spent (optional; leave blank until you know)
- Savings — Allow minus Actual, filled in automatically once you enter an actual
Units and the Multiplier
The Unit is a label describing what the rate is measured in; the × multiplier is how many of those units the line covers:
- day — a daily rate; set the multiplier to the number of shoot days
- week — a weekly rate; set the multiplier to the number of weeks
- flat — a one-off cost; the multiplier is usually 1
Tracking Actuals and Savings
As real costs come in, type them into the Actual column. The line’s Savings (Allow minus Actual) fills in automatically, and any line that’s over budget shows its savings in red. Department totals and the Grand Total each roll up an Actual and Savings figure once at least one line in that department has an actual, so the Top Sheet Summary doubles as an estimate-versus-actual report.
Deleting and Restoring Line Items
Hover a line item and click the trash icon. A confirmation appears — deletes are soft, so nothing is lost permanently. To bring a line back, click Show Deleted in the header: removed items reappear struck-through with a restore (undo) icon. Click it to reinstate the line, or Hide Deleted to tuck them away again.
Department and Grand Totals
Every department card header shows its running Allow (and Actual/Savings once you’ve entered actuals). Those subtotals feed the Grand Total row in the Top Sheet Summary, giving you a single production budget figure that updates the moment you change a cell.